Opening A Shop
The following tutorial will provide an overview of the first steps needed to open and prepare a shop for Concordia Market's, Market.
Please look through the other tutorials for more detailed instructions.
Step 1- Register for a Shop
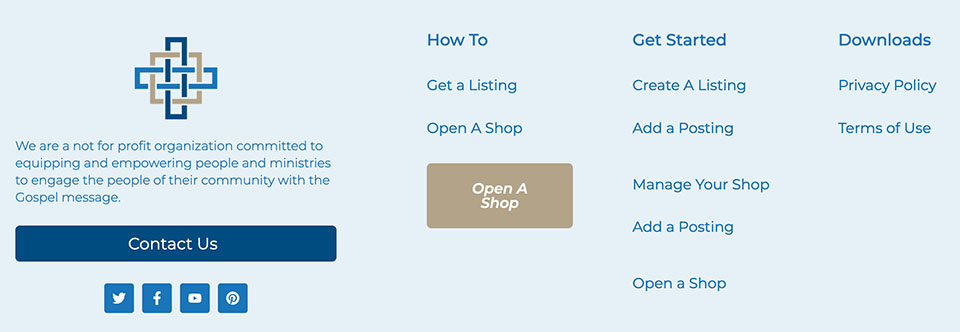
A) Select this link: http://concordiamarket.com/become-a-vendor/ to register for a shop account on the Market. You can also find links in the footer and main menu.
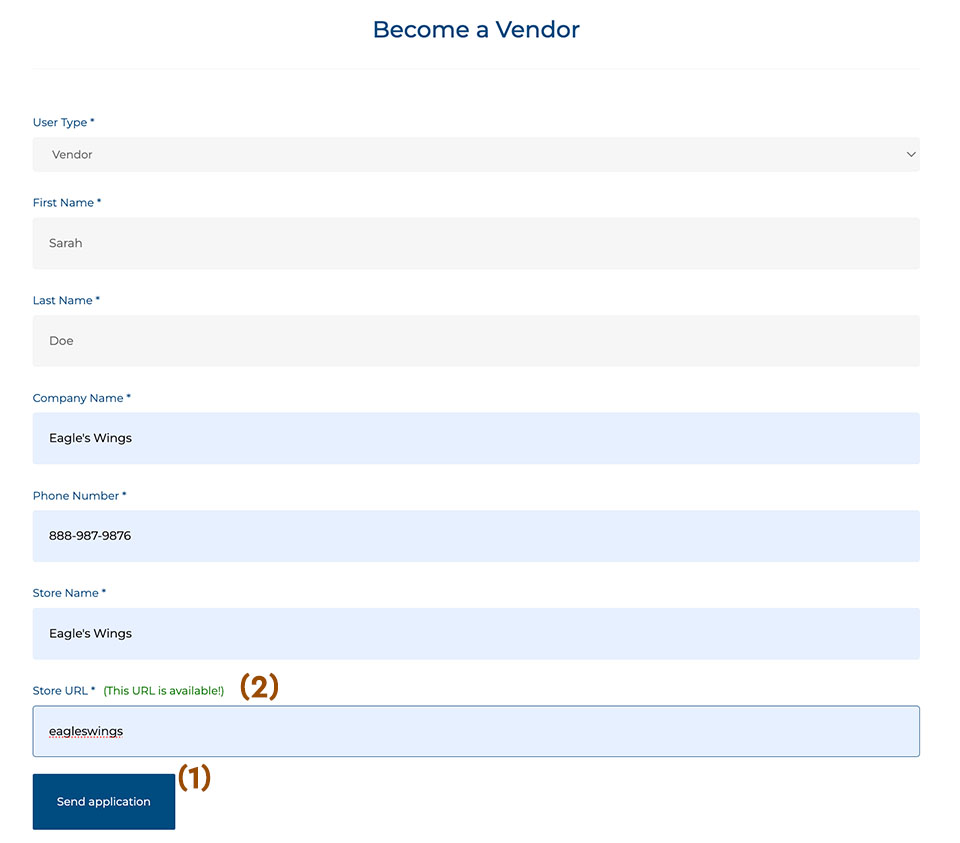
B) Complete the registration form. The "Store URL" (2) is the name that appears after the concordiamarket.com/. It must be one word, all lowercase.
C) Select the "Send Application" button when complete.
D) You should receive a simple notification that your application must be approved. It will take up to 24 hours, depending on the time of day the application is submitted.
Step 2- Set-up the shop details
A) Once you've received notification that your shop application has been approved, log into Concordia Market.
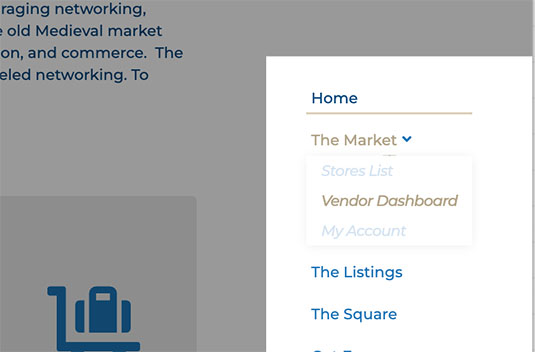
B) Select the new menu option that has now been enabled in your account, "Vendor Dashboard."
Quick Link: http://concordiamarket.com/vendor-dashboard/
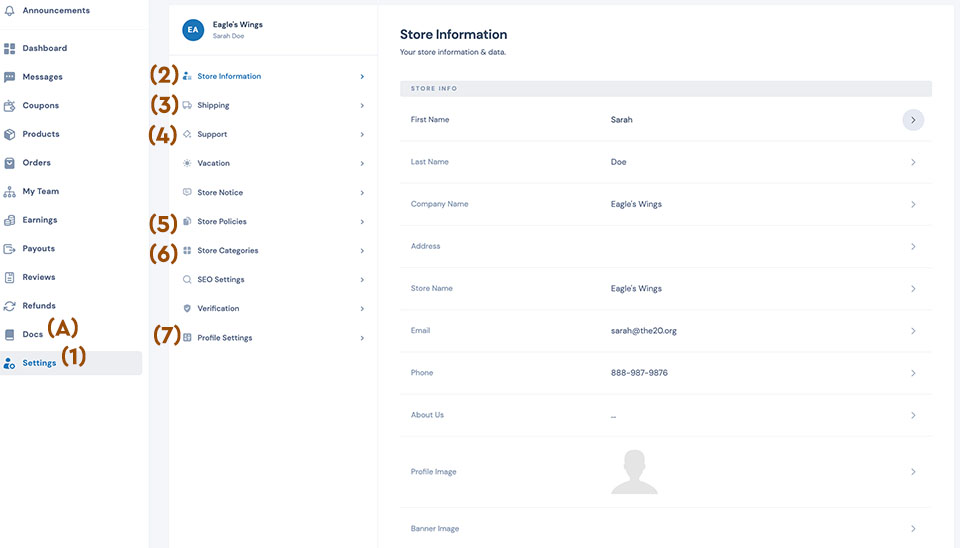
C) Choose the "Settings" tab (1) from the Vendor Dashboard.
D) Select the store information tab (2) to complete the basic information about the shop, including contact information and branding images.
E) The shipping information tab (3) only needs to be completed if the shop will sell physical products.
F) The shop owner needs to specify how their customers will interact with them using the Support tab (4). The default is the Market's internal messaging system.
G) Please add your store policies to the shop through the "Store Policies" tab (5). We have provided sample policies in the Doc's tab (A).
H) Store categories are used to improve the search function of the store. Use the Store Category tab (6) to identify the categories that best describe the types of content found in your shop.
I) The profile settings (7) enable the shop owner to determine what types of messages and alerts to receive from the shop. The default is to have all messages sent to the shop owner's email box.
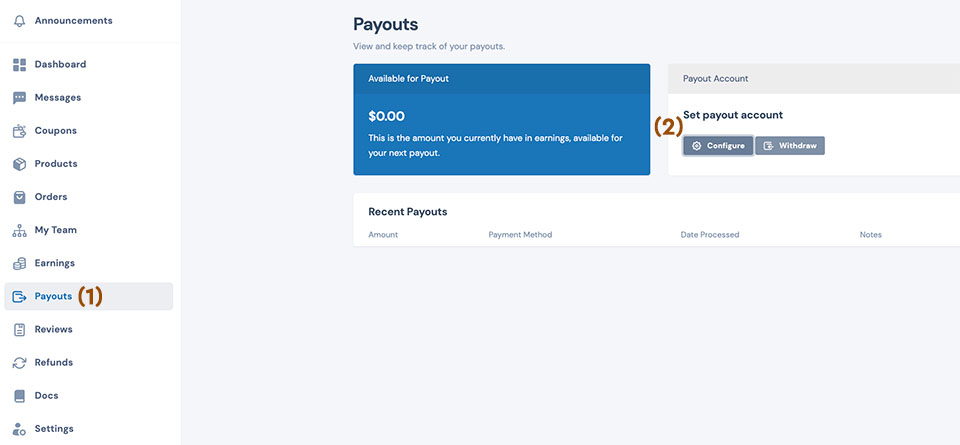
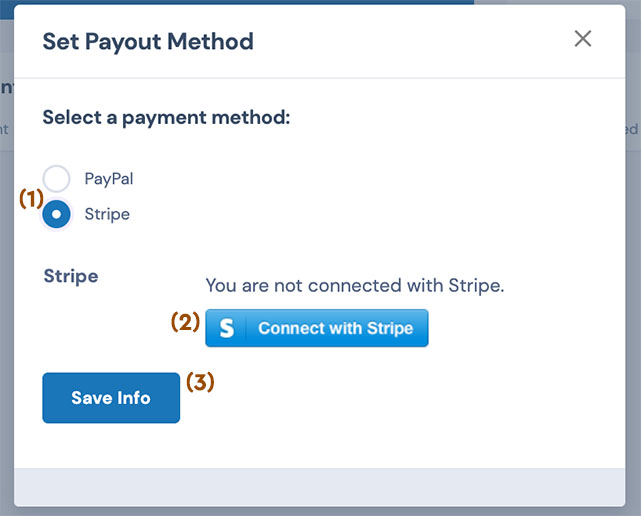
When the "Configure" button is selected the payout configuration window will open.
C) Select the "Stripe" payment method (1). If you do not select Stripe, you will not receive the funds from your shop.
D) Select the "Connect with Stripe" button (2)
E) Complete the stripe account page and select the "Save Info" button (3)
Stripe connect provides a multi-vendor payout feature which allows our shoppers to purchase items from multiple shops in one cart.
Step 4- Add Products
The final step in getting your shop running is to add products. We have a very helpful overview of a product listing found at this link.
We have a series of tutorials on adding the various types of products that can be found on Concordia Market. Those tutorials can be found here:

